Minimal Podcast Studio Design: Small Space, Limited Budget, Right Decisions

What “Minimal” Actually Means in Podcast Studio Design

In the context of a podcast studio, minimal means the fewest elements that still produce a clean recording, not an all-white aesthetic. Two separate problems need solving: soundproofing stops outside noise from entering the room, and acoustic treatment controls reverberation inside it. A room that looks clean but is missing either one will produce recordings that sound like a bathroom, regardless of how expensive the camera or microphone is.

The most common mistake is treating “minimal” as “just attach some fabric panels to the wall.” Fabric panels help control sound reflections inside the room, but they do nothing about noise coming from outside: HVAC hum, vehicles on the street, or a central air unit running above the ceiling. If the main problem is external noise, fabric panels on the walls will not change the recording result at all.

The correct framework is to work from outside in. Identify where the disruptive noise is coming from first, then decide which work is actually needed. If no external noise is entering, acoustic treatment inside the room is sufficient. If external noise is entering, soundproofing must be resolved before any interior treatment makes a meaningful difference.

This page covers decisions in that order. For a broader look at the full sequence of podcast studio interior design decisions, including furniture and lighting choices that support the workflow, there is a cross-reference available to read after this article.

How Much Space Does a Minimal Podcast Studio Actually Need?

The minimum room size for one podcaster is around 2×2 meters, provided the acoustic problems are handled correctly. That is not a vague “it depends”: 4 square meters gives enough space for one desk, one chair, absorber panels on the left and right walls, and bass traps in two rear corners.

Three scenarios come up most often in practice:

  1. An existing 2×2 meter room. This space can be treated acoustically, but low frequencies require care. Very small rooms tend to cause low-frequency buildup in the corners because the short distance between walls creates standing waves. The target reverberation time (RT60) for podcasting is 0.2 to 0.4 seconds. A room this small without adequate bass traps can produce an uneven RT60: high frequencies are already damped, but low frequencies are still ringing and make vocal tone sound boomy.
  2. A new partition built inside a larger room. This is often the more flexible option. Building an acoustic booth in the corner of a large office or living space gives control over dimensions, panel placement, and cable runs without altering the main structure of the building.
  3. A ready-made booth such as the one-person Silent Box. At 100x100x220 cm, this is the most compact option physically and requires no modification to the room it sits in. It is the relevant choice when the room cannot be changed structurally.

One principle to keep in mind: the smaller the room, the more precise the acoustic treatment needs to be. A smaller space is not automatically easier to treat. It is usually harder.

The Right Order of Work: What to Resolve Before Choosing Panels and Furniture

Creators who start with aesthetics, choosing wall colors and desk styles before examining acoustics, almost always redo the work. The correct sequence is outside in, structure before surfaces, function before appearance.

1. Identify external noise sources

Before buying a single sheet of acoustic material, sit in the intended studio room for 15 minutes with every device switched off. Note what you hear: traffic, HVAC, footsteps from the floor above, machinery from an adjacent room. These sounds determine whether the walls need soundproofing or whether acoustic treatment alone is enough. If no external noise enters, soundproofing work can be skipped.

2. Inspect walls, floor, and ceiling

Small gaps around pipes, poorly joined wall sections, or windows without acoustic seals are entry points for sound that are frequently overlooked. A core principle in building acoustics is that sound behaves like water: it enters through the smallest gap available. Sealing these gaps before adding any panels is inexpensive work that produces a disproportionate result.

3. Interior acoustic treatment

Once external sources are addressed and gaps are sealed, move to interior treatment. The panel positions with the greatest impact are at the first reflection points: the left and right walls level with the microphone, the wall behind the speaker, and the ceiling above the desk. Bass traps go in the room corners because that is where low-frequency energy accumulates most. Diffusers are needed only in rooms large enough that over-damping is a risk.

4. Aesthetics last

Color, lighting, and visual branding elements are finalized after acoustics are complete. Acoustic panels can be wrapped in fabric of any chosen color, and LED lighting can be positioned without sacrificing panel coverage. This sequence does not compromise appearance. It makes sure appearance does not compromise function.

To start this process correctly, a professional podcast studio build service with an on-site survey is the most efficient way to determine what work is genuinely required in the existing room before any budget is committed to materials.

When a Ready-Made Booth Makes More Sense Than Building a Room

A ready-made booth makes more sense when the room cannot be modified structurally, when the budget does not reach permanent construction, or when the setup may need to move locations. Permanent construction makes more sense when the space is fully owned, when more than one simultaneous microphone position is needed, or when the target isolation exceeds 50 dB. These two sets of conditions do not overlap. Determining which applies is a job for a site survey, not an assumption made from a photo.

For a more specific breakdown:

ConditionReady-made boothPermanent construction
Leased space, no modifications permittedYesNo
Must relocate when office movesYesNo
Very limited production timelineYes (14 to 30 days)Depends on scope
More than one microphone position neededLimitedYes
Target isolation above 50 dBNoYes
Space fully owned, long-term useOptionalYes

The Silent Box ready-made podcast booth is available in a 100x100x220 cm one-person configuration, priced at Rp 35,000,000 excluding VAT. Its isolation performance is in the range of 35 to 50 dB depending on material and construction. That figure is worth noting carefully: it is not measured against ISO 23351-1, the standard used by some international brands. ISO 23351-1 measures speech level reduction, which is a different metric from wall reduction (Rw) or STC. Without referencing the same measurement standard, figures from different manufacturers cannot be compared directly.

Permanent room construction work is handled directly in the Jabodetabek area. Projects outside Jabodetabek are covered with mobilization costs stated openly in the proposal.

The Materials a Podcast Studio Actually Needs

This is not a product catalog. These are materials that perform functions no other material can substitute without a significant compromise to the result.

  • Rockwool or Glasswool as the primary absorber inside panels. Both are fibrous materials that absorb sound energy and convert it to a negligible amount of heat. Rockwool is denser and more effective in the low-to-mid frequency range. Glasswool is lighter and often more cost-efficient. For a full comparison including density, recommended thickness, and the conditions where each performs best, read the Rockwool vs Glasswool comparison for sound dampening.
  • Mass-loaded membrane or double-layer gypsum board for mass law. Where soundproofing is needed because external noise is entering, wall mass must increase. The mass law in acoustics states that the heavier and denser the wall, the greater its resistance to sound transmission. Lightweight fabric panels do not function here.
  • Acoustic seals on door and window gaps. A gap as small as 1 cm under a door can undo most of the wall treatment work. Brush seals or neoprene gaskets fitted around the full perimeter of doors and windows close the main sound entry paths.
  • Bass traps in room corners. Standard panels are not effective enough below 200 Hz. Bass traps use thick absorbers or purpose-built resonant construction to control the low-frequency energy that accumulates in corners.

Egg-crate foam and pyramid foam are not on this list for a straightforward reason: both absorb only high frequencies above 1 kHz and do nothing for soundproofing. Attaching them to walls does not reduce outside noise, does not control low frequencies, and does not replace any of the materials above.

The Non-Binding First Step: Survey and Estimate Before Deciding

A site survey is the most efficient way to answer the question that matters most: can the existing room be treated acoustically at a reasonable cost, or is a ready-made booth the better total value once construction cost, time, and the risk of a result that misses expectations are all counted?

For those not yet ready for a survey, the budget estimator on the Kontraktor Studio homepage is a non-binding starting point. Enter the room dimensions and basic requirements, and the estimator returns a cost range before any commitment is required.

For locations outside Jabodetabek: Silent Box is modular and assembled on-site, so delivery is available across Indonesia. No construction team needs to remain on-site during installation, unlike permanent construction projects.

For specific questions about an existing room, the starting point is a consultation through the professional podcast studio service page, where the room condition can be assessed before any costs are incurred.

FAQ: Minimal Podcast Studio Design

What is the minimum room size for a functional podcast studio?

A 2×2 meter room is enough for one podcaster, provided the acoustic problems are solved: reverberation controlled with absorber panels and bass traps in the corners, and external noise sources identified. Very small rooms can cause low frequencies to accumulate and become hard to control. If the room cannot be modified, a ready-made booth like the one-person Silent Box at 100x100x220 cm is the more compact physical alternative.

Are egg-crate foam or pyramid foam enough for a podcast studio?

No. Egg-crate and pyramid foam only absorb high frequencies and do nothing for soundproofing. Noise from outside the room, HVAC hum, or bass impact from adjacent rooms will not be reduced by foam on the walls. A clean-sounding podcast studio requires Rockwool or Glasswool absorbers for room treatment, plus gap sealing and added wall mass where external noise is entering.

How much does it cost to design and build a minimal podcast studio?

Cost depends on the existing room condition, size, target decibel reduction, and materials chosen. No universal per-square-meter figure applies without inspecting the building, ceiling height, and surrounding noise sources. The non-binding first step is to fill in the budget estimator on the Kontraktor Studio homepage, followed by an on-site survey for Jabodetabek or a remote consultation for other locations.

What is the difference between acoustic treatment and soundproofing for a podcast studio?

Soundproofing stops sound from crossing the room boundary, for example traffic noise or sound from a neighboring room. Acoustic treatment controls reverberation and reflections inside the room itself. A good podcast studio needs both, but the proportion depends on how noisy the surrounding environment is. The two are frequently confused, and mixing them up is the most common reason podcast studio renovations produce disappointing results.

Can a podcast booth like Silent Box be shipped outside Jakarta?

Yes. Silent Box is modular and assembled on-site, so it can be shipped anywhere in Indonesia. Permanent room construction is limited to Jabodetabek and other major cities with mobilization costs stated openly in the proposal. For locations outside Jabodetabek, the ready-made booth is often the more practical choice because it does not require a construction team to stay on-site.

Discuss Your Podcast Studio Design

Podcast Studio Interior Design: Acoustic Decisions Before Aesthetics

Why podcast studio interior design must start with acoustics, not aesthetics

Acoustic decisions determine what can go on the walls. Sound-absorbing panels need an air gap from the concrete surface to work at low frequencies. If wallpaper or textured paint is already in place, the panels cannot be installed correctly without tearing it out first. The right order is: set a target reverberation time, specify the acoustic layers, then choose the decorative finish on top of those layers.

The most common pattern is creators who start from visual references, colored panels, LED strips, textured backdrops, and only then realize their recordings still have echo or the noise floor is too high. The fix is almost always the same: remove part of the finish, install the acoustic layer that should have been there from the start, then close it back up.

This is not a choice between a room that sounds good and a room that looks good. Both are achievable at the same time, as long as the order is right. Fabric-wrapped acoustic panels installed with an air gap from the wall can also be a strong visual element. But the decisions about gap depth, panel thickness, and material density must be made before the fabric color is chosen, not after.


What room size is right for a podcast studio?

There is no single ideal size, but there is a reasonable range depending on the number of hosts and the recording format. For one person, a 2×2 meter room with a ceiling height of at least 2.4 meters is functional. For two to three people, 3×3 meters to 3×4 meters is more comfortable because it provides space for separate microphones, adequate desk area, and some distance between speakers and the walls.

More critical than absolute size is the ratio of length, width, and height. A room where all three dimensions are equal or simple multiples of each other will reinforce certain frequencies excessively, because sound waves bounce back and forth between two parallel surfaces without being absorbed. This is known as room modes.

A simple example: a 3x3x3 meter room is acoustically more problematic than a 3×3.7×2.6 meter room even though the floor area is nearly the same. Uneven proportions break up the concentration of room modes, making treatment easier and producing more consistent results across the full frequency range.

Rooms that are too small, under 2×2 meters with a low ceiling, tend to reinforce low frequencies below 200 Hz and make voices sound closed-in or boxy. Rooms that are too large, over 5×5 meters without treatment, have a long reverberation time and require more absorptive panels to reach the same target.


What acoustic materials are used in a podcast studio, and where do they go?

Before choosing materials, it helps to understand two separate tasks: absorbing echo inside the room and stopping sound from passing through the room boundaries. These are often treated as the same problem, but the methods and materials are different. For a full explanation, see the article on the difference between sound absorption and sound isolation.

For a podcast studio, the primary goal is usually to absorb echo inside the room so recordings sound clean, rather than building full isolation like a music recording studio. Here are the materials commonly used and where they go:

  • Fabric-wrapped wall panels. Panel cores are typically Rockwool or glasswool at a density of 40 to 80 kg/m³. Panels are installed with a 5 to 10 cm air gap from the concrete surface so they absorb low frequencies effectively. See the comparison of Rockwool and glasswool for sound absorption to choose based on budget and target frequency range.
  • Diffusers. A room with too much absorption sounds dead and unnatural. Diffusers are placed on one wall or on the ceiling to scatter sound waves without absorbing them, maintaining a balance between a controlled and a lively room.
  • Ceiling treatment. The ceiling is often overlooked. Installing absorptive panels or material on the ceiling, especially directly above the speaking position, reduces early reflections that reach the microphone most directly.
  • Floor treatment. A thick carpet with an underlayer is the simplest solution. For more serious studios, a floating floor isolated from the building structure helps reduce vibration transmission from outside.

Panel thickness and material density determine which frequencies are absorbed. A 2.5 cm panel is effective at high frequencies above 1 kHz but does not address low frequencies below 500 Hz. For human speech, where most energy sits between 100 and 300 Hz, a panel of at least 5 cm with an air gap is more effective. Research on small-room acoustics presented at INTERNOISE 2014 shows how room modes in small spaces significantly affect the frequency response characteristics of recordings.

If the goal also includes preventing sound from leaking into adjacent rooms, a layered wall construction with an air gap and a dense core material is required, not just absorptive panels on the surface.


How do you design a podcast studio that looks professional on camera?

Once the acoustic foundation is in place, aesthetic questions can be answered more precisely because you already know what elements are in the room and on which surfaces. This is what makes the decision order relevant not just for acoustics but for efficient interior design overall.

Several principles apply to a podcast studio that looks professional on camera:

  • Fabric-wrapped panels as the backdrop. This is the most efficient element because one object serves two functions: absorbing echo behind the speaker and providing a clean background on camera. Choose fabric with a texture that is not too smooth, so it does not reflect excessive light.
  • Neutral colors or brand accent colors. Dark colors such as dark grey, navy, or dark green perform well across different lighting conditions and are not prone to overexposure. Lighter colors require tighter lighting control.
  • Room depth for background blur. Placing the speaker at least 1.5 to 2 meters from the backdrop gives the camera enough distance to produce a depth-of-field effect that visually separates the subject from the background.
  • Background props. Books, small plants, or objects of varying depth behind the speaker add visual dimension and can contribute to sound diffusion if placed on open shelving.
  • Light positioning. The key light should not point directly at reflective surfaces. A fill light that is too high or too low creates distracting shadows. Light positions need to be decided before wall panels are installed, because light stands or mounting brackets need clear access points.
  • Monitor and cable placement. A screen that enters the recording frame is a visual distraction that is easy to avoid if the desk layout is planned from the start. Tidy cable runs are also far easier to prepare before the walls are closed with panels.

When is a DIY podcast studio enough, and when do you need an acoustic contractor?

DIY is sufficient when the room is naturally quiet, external noise sources are low, and the recordings are not for commercial broadcast. A contractor is needed when there is mechanical noise from central air conditioning or traffic, when the room is being built from scratch, or when the recordings will be used for paid production with clients. For creators who do not want to renovate, a prefabricated acoustic booth installed inside an existing room is a practical alternative.

More specifically, answer these questions before deciding:

  • What is the current noise floor of the room, measured with a decibel meter app or audio meter? If it is above 40 dB(A), standard DIY panels are unlikely to be enough.
  • Where is the noise coming from? Outside noise entering through windows requires a different solution than vibration from air conditioning or noise from the floor above.
  • Is the room existing or being built from scratch? A room built from scratch allows construction decisions that are not available in an existing space.
  • Are there paying clients or listeners? If yes, the expected technical standard is different from a hobby podcast.

For creators renting office space or those who cannot touch the building structure, a prefabricated acoustic booth that can be installed without renovation is a reasonable option. This type of booth can be moved if the office relocates, does not require renovation approval from building management, and its specifications are known before purchase.

If the decision is to build a permanent studio, consider using a podcast studio build service with experience handling varied building conditions, including office buildings with mechanical noise from HVAC systems.


Checklist before building a podcast studio

Work through this list before buying materials or hiring a crew:

  1. Room dimensions and proportions are measured. Record length, width, and ceiling height. Check whether any two dimensions are exact multiples of each other.
  2. External noise sources are identified. Measure the noise floor at different times, morning, midday, and evening, because sources can vary throughout the day.
  3. Target RT60 is set. For podcasting, a reverberation time of 0.2 to 0.4 seconds is comfortable. This number is the basis for calculating how much surface area needs treatment.
  4. Acoustic material budget is separated from the aesthetics budget. When these are combined, both tend to be underfunded.
  5. Camera position and light direction are planned. Panels that are already installed are difficult to move to accommodate a camera setup that turns out to need a different angle.
  6. Power and ethernet cable routes are prepared before the walls are closed. This includes outlet positions, microphone cable runs, and network cables for live streaming.

If any variables in this checklist are still unclear, the most efficient next step is an on-site survey before deciding which route to take. Read more about what a contractor does when building a podcast studio to understand the workflow from initial measurement through handover.

Discuss your podcast studio requirements with us to get an initial picture based on the actual condition of your space, not on assumptions.


FAQ: Podcast studio interior design

What is the minimum room size for a single-person podcast studio?

A 2×2 meter room with a ceiling height of at least 2.4 meters is sufficient for one host with one microphone. More important than size is proportion: avoid rooms where length and width are exactly equal, because that reinforces certain frequencies. A 2×2.4 meter room has better acoustics than a 2×2 meter room even though the difference in floor area is small.

Can acoustic panels be installed without modifying the walls?

Yes, using panels hung on rails or brackets without permanent fixing. These panels are effective at absorbing echo inside the room. However, if the goal is to stop outside noise from entering or to prevent recorded sound from leaking into other rooms, hanging panels alone are not enough. That requires a layered wall construction with an air gap.

What background color works best for a podcast studio?

Dark neutral colors such as dark grey, navy, or dark green are most commonly used because they do not reflect excessive light into the camera lens and look professional across different lighting setups. Light colors like pure white tend to overexpose if lighting is not tightly controlled. More importantly, the material behind the speaker should also serve an acoustic function, for example fabric-wrapped panels rather than painted walls.

How much does it cost to design and build a professional podcast studio?

The range varies widely depending on room size, the existing condition of the building, the target noise floor, and material specifications. A single-host podcast studio in a relatively quiet room can cost far less than a studio built inside an office building with a noisy central air conditioning system. The most accurate way to get a number is an on-site survey, because a contractor needs to measure the existing conditions before specifying materials.

Can a prefabricated acoustic booth replace a permanently built podcast studio?

It depends on the need. A prefabricated acoustic booth suits creators who need a clean recording space without renovation, want the flexibility to relocate, or rent office space that cannot be structurally modified. A permanently built studio is more appropriate when recording multiple guests at once, when a separate control room is needed, or when a fully customized visual setup is required for production.

Silent Booth for Voice Over: Specs That Differ from Office Phone Booths and When a Ready-Made Product Is Enough

Two different problems that are often treated as one

When someone searches for a “soundproof booth” for the office, the problem they want to solve is usually a single one: keep conversations from leaking out and protect privacy. When a voice over artist looks for a recording booth, the problem runs in the opposite direction: the interior of the booth must be as acoustically dead as possible so the microphone does not pick up reflections, reverb, or noise from the ventilation system.

Both needs call for a booth. But the specifications are not the same, and assuming that an office phone booth automatically works for voice recording is a common source of disappointment after the unit is already installed.

The fundamental difference is the direction of the acoustic work. An office phone booth stops sound from passing through the walls, which is transmission isolation. A voice over booth must do that and also control what happens inside: absorb reflections and suppress noise. To understand the difference between these two concepts more clearly, it is worth reading about the difference between sound absorption and soundproofing before deciding which type of product you need.

This article explains the technical differences between the two, where the Silent Box sits between them, and when a ready-made product is sufficient for voice over work.

What a voice over booth needs that an office phone booth does not

An office phone booth is designed to keep sound inside so conversations are not audible in adjacent areas. A voice over booth must do the reverse, and to a stricter standard: make the interior as acoustically dead as possible, with an RT60 below 0.3 seconds, no flutter echo between parallel walls, and the lowest achievable noise floor. A condenser microphone for recording captures all of that. A standard office headset microphone is not sensitive enough to notice. Transmission isolation still matters, but it is not the only measure.

Three technical points are worth understanding in detail:

  1. Interior acoustic treatment to absorb mid to high frequencies. Flutter echo, the reflection that bounces back and forth between two parallel hard walls, is the defining problem of small hard-surfaced rooms. An office phone booth is acceptable if speech sounds natural during a call. A voice over booth must actively suppress flutter echo through absorption panels placed at corners and on facing walls. Thin foam on the surface is not enough to handle the low-to-mid frequencies that are common in male vocal recordings.
  2. A low noise floor from the ventilation system. High-sensitivity condenser microphones, the type used in most professional voice over sessions, pick up fan noise, air turbulence in ducts, and mechanical vibration from blowers. An office phone booth treats ventilation as “quiet enough” if it does not interfere with a conversation. For recording, the standard is far stricter: ventilation noise should be inaudible in the recording. This is why the ventilation system design in a recording booth is technically different from the design in a conversation booth.
  3. A short RT60. RT60 is the time it takes for sound to decay by 60 dB after the source stops. For voice over and narration, an RT60 below 0.3 seconds is the widely accepted standard for an adequate recording environment. An office conversation room can tolerate RT60 up to 0.5 seconds without it feeling like a problem. The difference looks small as a number, but its effect on unedited raw recordings is significant.

Silent Box specifications relevant to voice over: what already works, what needs to be configured

The Silent Box is built with three-layer fabric-wrapped acoustic panels covering all interior surfaces, a ceiling exhaust system designed to suppress air circulation noise, a timber floor, and integrated LED lighting. It is not an empty shell you have to fit out yourself. Compared with self-applied foam tiles or egg-crate panels, the Silent Box starts at a meaningfully different level of interior treatment.

For voice over use, the following aspects are already covered in the standard configuration:

  • Fabric-wrapped absorption panels that provide mid-to-high frequency absorption and reduce the risk of flutter echo compared to bare hard walls.
  • Sound transmission isolation in the range of 35 to 50 dB, depending on construction and materials used. That is enough to block typical noise from an office or home environment.
  • A height of 220 cm. This is worth stating practically: a vertical microphone boom stand, including types with long arms, will not hit the ceiling. Some booths available globally sit at 222 to 230 cm but require a room with a ceiling of at least 240 cm. At 220 cm, the Silent Box fits more easily into offices and homes with standard ceiling heights.

The following points need a conversation before placing an order for professional recording use:

  • Ventilation specifications for a stricter noise floor. For high-sensitivity condenser microphones, it is recommended to discuss this requirement before ordering. Reading about why a quiet ventilation system is critical will help you understand the variables involved.
  • Custom absorption material configuration if the client requires a lower RT60 than the standard conversation-booth baseline.

The three standard Silent Box sizes, full interior specifications, and custom configuration options are available on the Silent Box product page. For professional recording, the right approach is to discuss specifications before ordering, not to order a standard unit and hope the results meet your recording standard.

When the Silent Box is enough for voice over, and when you need to build a permanent recording room

The standard Silent Box configuration is sufficient for corporate voice over, e-learning narration, light dubbing, and podcasts distributed on digital platforms. The deciding factor is not the size of the booth but the end client’s standard. If a client requires a noise floor below -60 dBFS or compliance with national broadcast television standards, that requirement is better met by a permanently built recording room with fuller construction control, not by any ready-made booth.

A practical way to decide:

  • Silent Box is sufficient: voice over for corporate video, e-learning, YouTube narration, independent podcasts, online casting auditions, and dubbing for digital content. An environment that is significantly cleaner than an untreated room already makes a meaningful difference in recording quality for these purposes.
  • Needs further consideration: national radio or television commercials, post-production houses with specific delivery standards, or projects that require a written noise floor certification from a recording studio.

If your need falls into the second category, the service for building a permanent recording room provides fuller construction control: site survey, acoustic measurement, acoustic design, installation by a dedicated team, and acoustic testing after completion.

Quick comparison: ready-made booth vs portable foam vocal booth vs permanent room build

AspectPortable foam vocal boothReady-made booth (such as Silent Box)Permanent recording room
Sound transmission isolationVery limited, almost none35 to 50 dB depending on constructionCan be designed to a specific target
Interior treatment qualityLimited absorption around the head onlyFabric-wrapped panels on all interior surfaces, more controlled RT60Fully designed to target RT60 and noise floor
Ease of installationVery easy, ready to use immediatelyRequires assembly, production lead time 14 to 30 daysA construction project requiring a site survey and longer timeline
Ability to relocateCan be moved at any timeModular, can be disassembled and reassembled at a new locationPermanent, cannot be moved
Investment rangeRelatively lowMid-range, starting from IDR 35,000,000 excluding VATHigher, depending on floor area and specifications

The ready-made booth sits objectively in the middle: significantly better than a portable foam booth, which only creates the illusion of a dead room without real isolation, but not equivalent to a permanent recording studio built with full construction control from the ground up. For most independent or semi-professional voice over artists, that middle position is the most sensible option in terms of cost and flexibility.

Shipping outside the Jakarta area for voice over artists working in other cities

Many voice over artists work from home, and their homes are not always in Jakarta. The Silent Box is designed to be modular: each unit can be disassembled, packaged, shipped anywhere in Indonesia, and reassembled at the destination, including inside a residential home.

The shipping process:

  1. The order is confirmed and the final specifications are agreed upon.
  2. Production runs for 14 to 30 days at the workshop.
  3. The unit is packaged and shipped to the destination city.
  4. Assembly is carried out on-site by the team or an installation partner.

Shipping cost is not quoted here because it depends on the destination city, the freight method, and the volume of the unit. For complete information, including cities that have been served previously, see the shipping and assembly details page.

Steps before ordering: what to prepare and what the team will ask

Buying a Silent Box for voice over use does not start with picking a size on the product page and checking out. The team will ask several questions before preparing a formal quote:

  • The dimensions of the room where the booth will be placed, including ceiling height and the width of the entry door the unit will pass through during delivery.
  • The type of recording you will do: corporate voice over, professional dubbing, podcasting, or a mix of several.
  • The microphone type you use: condenser or dynamic. High-sensitivity condenser microphones require a stricter ventilation noise floor than dynamic microphones.
  • The installation location: an office or a home. Each has different logistical implications, particularly for cities outside the Jabodetabek area.

These questions are not a formality. The answers determine whether the standard configuration is sufficient or whether material and ventilation adjustments are needed before production begins. Ordering without this conversation risks receiving a unit that does not meet your recording standard.

Discuss your recording requirements before placing an order using the estimate form. The team will respond with relevant technical questions, not with a price quote that ignores the context.

FAQ

Can the Silent Box be used for professional voice over recording?

It depends on the end client’s standard. For corporate voice over, e-learning narration, podcasts, and light dubbing, the standard Silent Box configuration delivers a significantly cleaner environment than an untreated room. For recordings that require a broadcast noise floor or top-tier post-production house standards, a custom configuration discussion or a permanent recording room build is the right next step.

What is the difference between a voice over booth and an office phone booth?

An office phone booth prioritizes sound transmission isolation so conversations do not leak out. A voice over booth prioritizes interior acoustic quality, specifically a short RT60 and zero flutter echo, because a recording microphone captures every reflection that a standard office headset microphone would never detect. Both need isolation, but the design priorities are different.

What is the ideal RT60 for a voice over booth?

For voice over and narration, an RT60 below 0.3 seconds is the widely accepted target. It delivers a dead-room character without feeling uncomfortable. The exact figure depends on booth size, the absorption materials used, and whether any furniture is inside. This differs from an office conversation room, which can tolerate RT60 up to 0.5 seconds.

Can the Silent Box be shipped outside Jakarta for voice over artists working from home?

Yes. The Silent Box is modular, so it can be shipped anywhere in Indonesia and assembled on-site, including in residential homes outside the Jabodetabek area. Production lead time is 14 to 30 days, not including shipping time, which varies by destination city and chosen freight method. Shipping cost is quoted per order because it depends on distance and volume.

Is the Silent Box ventilation quiet enough for condenser microphone recording?

The Silent Box uses a ceiling exhaust system designed to suppress noise from air circulation. For high-sensitivity condenser microphones used in professional studios, it is recommended to discuss ventilation specifications in detail before ordering, because the noise floor requirement for recording differs from the comfort requirement for office conversations.

Portable foam vocal booths are cheaper. Why choose the Silent Box?

A portable foam vocal booth only adds absorption around your head. It provides no meaningful sound transmission isolation. Noise from outside the room, HVAC, footsteps, and neighbors still comes through. The Silent Box provides both: transmission isolation and interior treatment, in one unit that can be disassembled and moved when you relocate. The trade-off is size, weight, and a higher price.

Akustik Home Theater di Ruangan Kecil: Masalah, Penyebab, dan Urutan Penanganan yang Benar

Akustik Home Theater di Ruangan Kecil: Masalah, Penyebab, dan Urutan Penanganan yang Benar

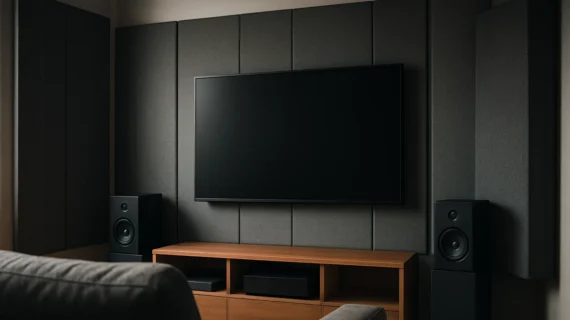
Home theater di ruangan kecil bukan sekadar versi yang lebih kecil dari bioskop besar. Ruangan dengan volume terbatas menciptakan masalah akustik tersendiri yang justru lebih sulit diprediksi dan lebih sulit diperbaiki. Panduan ini menjelaskan penyebabnya, urutan penanganan yang benar, dan kapan pekerjaan ini perlu melibatkan kontraktor akustik, bukan sekadar membeli panel dari toko online.

Kenapa Ruangan Kecil Justru Lebih Sulit Ditangani secara Akustik?

Ruangan kecil memiliki jarak antardinding yang pendek, sehingga frekuensi rendah membentuk standing wave atau room mode yang kuat. Ketika dimensi ruangan mendekati proporsi kubus, beberapa mode muncul di frekuensi yang sama dan saling memperkuat, menghasilkan bass yang terdengar boomy di titik tertentu dan hilang sama sekali di titik lain. Ini adalah masalah fisika ruang, bukan masalah bahan peredam yang kurang banyak.

Untuk memahami sebab-akibatnya secara konkret: frekuensi rendah memiliki panjang gelombang yang besar. Pada 80 Hz, panjang gelombangnya sekitar 4,3 meter. Ruangan dengan lebar 3,5 meter akan memaksa gelombang itu memantul bolak-balik dan membentuk pola berdiri (standing wave) di mana energi menumpuk di sudut dan menghilang di titik nodal di tengah ruangan. Pendengar yang berpindah satu meter saja bisa merasakan perbedaan level bass yang sangat signifikan.

Frekuensi yang paling bermasalah berada di bawah 300 Hz, dan di sinilah busa tipis tidak berdaya. Material absorpsi tipis hanya efektif di frekuensi tinggi, karena untuk menyerap frekuensi rendah dibutuhkan ketebalan material yang sebanding dengan panjang gelombang yang ingin diserap.

Ruangan yang dimensinya mendekati kubus (misalnya 3 x 3 x 3 meter, atau 3 x 3,5 x 3 meter) paling bermasalah karena room mode aksial (dari satu dinding ke dinding lain), tangensial (melibatkan dua pasang dinding), dan oblique (melibatkan semua permukaan) saling bertumpuk di frekuensi yang hampir sama. Efeknya tidak bisa diselesaikan hanya dengan menambah bahan. Proporsi dimensi harus diperhitungkan sejak awal desain, atau ruangan yang sudah ada harus diperlakukan dengan pendekatan yang lebih sistematis dari sekadar melapisi dinding dengan panel.

Tiga Masalah Akustik Paling Umum di Home Theater Ruangan Kecil

Ketiga masalah berikut adalah masalah acoustic treatment, bukan soundproofing. Ini penting untuk dibedakan sejak awal karena solusinya berbeda.

1. Bass Muddy karena Room Mode Menumpuk di Sudut

Energi frekuensi rendah cenderung menumpuk di sudut ruangan, terutama di sudut yang mempertemukan dua dinding dan lantai atau plafon. Efeknya adalah bass yang terdengar tidak jelas: nada rendah saling menimpa, instrumen bass dan kick drum terdengar menyatu menjadi satu gumpal suara yang tidak terdefinisi. Pendengar yang duduk terlalu dekat ke sudut akan mendengar bass yang jauh lebih keras dibanding yang duduk di tengah ruangan.

2. Flutter Echo karena Dua Dinding Paralel

Flutter echo adalah pantulan berulang cepat yang terjadi ketika suara memantul bolak-balik antara dua permukaan keras yang sejajar. Di ruangan kecil dengan dinding plester atau gypsum tanpa treatment, suara “tepuk tangan” sederhana akan menghasilkan dengung bergelombang yang terdengar seperti suara gemetar. Efek ini merusak kejelasan dialog dan detail musik.

3. Waktu Dengung (RT60) yang Tidak Tepat

RT60 adalah waktu yang dibutuhkan suara untuk meluruh sebesar 60 dB setelah sumber suara berhenti. Untuk home theater di ruangan kecil di bawah 30 meter kubik, RT60 yang ideal umumnya berada di kisaran 0,2 sampai 0,4 detik. Ruangan dengan plafon dan dinding keras tanpa treatment bisa memiliki RT60 di atas 0,6 detik, membuat dialog film terdengar seperti diucapkan di kamar mandi. Sebaliknya, ruangan yang terlalu banyak dilapisi material absorpsi bisa memiliki RT60 di bawah 0,15 detik, menghasilkan suara yang terasa “mati” dan tidak alami. Keseimbangan antar frekuensi dalam RT60 juga penting: bass yang meluruh lebih lambat dari frekuensi tinggi adalah kondisi paling umum di ruangan kecil yang belum ditreatment.

Soundproofing dan Acoustic Treatment: Dua Pekerjaan Berbeda yang Sering Dicampur

Soundproofing menahan suara menembus batas ruangan: dinding, lantai, dan plafon. Tujuannya adalah agar suara dari dalam ruangan tidak keluar mengganggu tetangga atau penghuni kamar lain, dan agar suara dari luar tidak masuk mengganggu pengalaman menonton. Ini bekerja di level struktur bangunan.

Acoustic treatment mengatur perilaku suara di dalam ruangan. Tujuannya adalah mengurangi pantulan yang tidak diinginkan, menyeimbangkan RT60, dan mengatasi penumpukan energi di sudut. Ini bekerja di permukaan interior ruangan.

Memasang panel akustik di dinding tidak membantu jika tujuannya adalah agar suara film tidak terdengar di kamar tidur sebelah. Sebaliknya, mengisolasi dinding dengan lapisan ganda gypsum dan material padat tidak akan menyelesaikan flutter echo atau bass muddy di dalam ruangan. Dua pekerjaan ini perlu direncanakan secara terpisah, dikerjakan dalam urutan yang benar, dan dianggarkan secara berbeda.

Untuk penjelasan lebih mendalam tentang konsep ini, termasuk mekanisme kerja masing-masing pendekatan, baca artikel tentang perbedaan peredam suara dan kedap suara yang menjelaskan keduanya secara teknis tanpa menyederhanakan berlebihan.

Ruangan home theater kecil hampir selalu membutuhkan keduanya. Tapi urutannya tidak bisa dibalik: isolasi struktural dikerjakan lebih dulu, acoustic treatment menyusul setelah struktur selesai.

Urutan Penanganan yang Benar Sebelum Membeli Satu Panel Pun

Langkah-langkah berikut berlaku baik untuk ruangan yang baru dibangun maupun ruangan yang sudah ada dan ingin dikonversi.

  1. Ukur dimensi ruangan dan evaluasi proporsinya. Hitung rasio panjang, lebar, dan tinggi. Kalau ketiga dimensi ini terlalu mirip satu sama lain, room mode akan menumpuk di frekuensi yang sama dan masalah bass akan lebih parah. Ini menentukan apakah ruangan butuh penanganan room mode yang agresif atau cukup dengan bass trap standar di sudut.
  2. Tentukan target dengan jelas sejak awal. Apakah tujuannya hanya membuat suara di dalam ruangan terdengar lebih baik, atau juga memastikan suara tidak terdengar di ruangan lain? Dua target ini membutuhkan pendekatan dan anggaran yang berbeda. Jangan mencampur keduanya dalam satu asumsi.
  3. Kalau isolasi diperlukan, tangani semua batas ruangan sekaligus. Dinding, lantai, dan plafon harus diperlakukan bersamaan. Satu titik bocor, misalnya plafon yang tidak ditreatment sementara dinding sudah diisolasi, cukup untuk menghancurkan hasil isolasi keseluruhan. Prinsip ini dikenal sebagai “rantai paling lemah”: nilai isolasi keseluruhan ditentukan oleh elemen yang paling lemah, bukan rata-ratanya.
  4. Pasang acoustic treatment setelah struktur isolasi selesai. Memasang panel absorpsi di dinding permukaan sebelum pekerjaan isolasi struktural tuntas adalah pemborosan. Panel bisa terpaksa dibongkar atau dipindah ketika pekerjaan struktural dimulai. Urutan ini yang membedakan perencanaan profesional dari pendekatan coba-coba yang sering dilakukan sendiri.

Kontraktor akustik profesional melakukan survei dan pengukuran kondisi awal, menghitung kebutuhan isolasi dan treatment secara terpisah, lalu menyusun desain dan RAB sebelum satu pun material dibeli. Ini berbeda dari pendekatan DIY yang sering dimulai dari membeli panel dulu baru melihat hasilnya.

Posisi Bass Trap, Panel Absorpsi, dan Diffuser di Ruangan Kecil

Penempatan yang benar sama pentingnya dengan pilihan material. Material yang bagus di posisi yang salah tidak akan bekerja optimal.

Bass trap ditempatkan di sudut ruangan, terutama sudut tiga arah: pertemuan dua dinding dengan lantai, dan pertemuan dua dinding dengan plafon. Di sinilah energi frekuensi rendah paling banyak menumpuk. Bass trap membutuhkan material padat dengan ketebalan yang cukup, dan untuk efektif di frekuensi di bawah 150 Hz, ketebalan panel perlu di atas 15 sampai 20 cm. Untuk pilihan material, baca artikel tentang perbandingan Rockwool dan Glasswool untuk peredam suara karena keduanya sering dipakai sebagai isian bass trap dengan karakteristik yang berbeda.

Panel absorpsi menangani frekuensi menengah sampai tinggi. Panel dengan ketebalan minimal 5 cm ditempatkan di first reflection point, yaitu titik di dinding kiri dan kanan di mana suara dari speaker depan pertama kali memantul sebelum sampai ke telinga pendengar utama. Titik ini bisa ditemukan dengan cermin: duduk di posisi menonton, lalu minta seseorang menggeser cermin di sepanjang dinding samping sampai speaker terlihat dari posisi duduk. Di situlah panel absorpsi perlu dipasang. Koefisien absorpsi material bervariasi per frekuensi, bukan angka tunggal, sehingga spesifikasi material sebaiknya diperiksa per oktaf, bukan hanya nilai rata-ratanya.

Diffuser menyebarkan suara tanpa mengurangi energi total, cocok di dinding belakang ruangan untuk menghindari pantulan langsung yang mengganggu. Namun di ruangan yang sangat kecil, di bawah 10 meter persegi, diffuser sering tidak efektif karena jarak dari sumber suara terlalu pendek untuk diffuser bekerja sebagaimana mestinya. Dalam kondisi ini, panel absorpsi tipis di dinding belakang lebih pragmatis.

Kapan Harus Memanggil Kontraktor Akustik, Bukan Hanya Memasang Panel Sendiri?

Kontraktor akustik diperlukan ketika target isolasi ke ruangan lain di atas 30 dB, ketika ruangan berbagi lantai dengan kamar tidur atau ruang kerja, atau ketika dimensi ruangan sangat tidak proporsional sehingga butuh perhitungan room mode secara teknis. Pemasangan panel sendiri bisa efektif untuk meredam gema ringan, tetapi tidak akan memadai jika struktur dinding, lantai, dan plafon belum memenuhi persyaratan isolasi yang direncanakan dari awal.

Panduan praktisnya:

  • DIY cukup jika ruangan sudah cukup terisolasi secara struktur (misalnya dinding bata tebal ke luar bangunan), tujuannya hanya memperbaiki kualitas suara di dalam, dan RT60 hanya perlu sedikit dikurangi.
  • Kontraktor diperlukan jika target isolasi melibatkan ruangan lain di dalam bangunan yang sama, jika ruangan berada di atas atau di bawah ruangan yang sering digunakan orang lain, atau jika perhitungan room mode menunjukkan proporsi ruangan yang sangat bermasalah dan butuh solusi konstruksi, bukan sekadar panel permukaan.

Kontraktor akustik yang bekerja secara profesional melakukan survei lapangan, pengukuran kondisi awal, perhitungan teknis, desain, dan RAB terlebih dulu sebelum pekerjaan dimulai. Untuk layanan ini, lihat halaman jasa pembuatan home theater yang menjelaskan lingkup kerja dan proses dari survei sampai serah terima.

Pertanyaan yang Sering Diajukan tentang Akustik Home Theater Ruangan Kecil

Berapa ukuran ruangan minimum yang direkomendasikan untuk home theater yang akustiknya bisa ditangani dengan baik?

Tidak ada angka minimum yang baku, tetapi ruangan di bawah 15 meter persegi dengan tinggi plafon standar 2,8 meter mulai menghadapi masalah room mode yang sulit diatasi hanya dengan panel permukaan. Semakin mendekati proporsi kubus, semakin banyak mode yang menumpuk di frekuensi yang sama. Ruangan dengan proporsi sekitar 1 banding 1,25 banding 1,6 lebih mudah dikelola secara akustik.

Apakah panel busa telur atau busa piramid cukup untuk home theater rumahan?

Tidak. Busa tipis hanya menyerap frekuensi tinggi di atas 1.000 Hz dan tidak menyentuh masalah utama ruangan kecil yaitu room mode dan bass muddy di bawah 300 Hz. Bass trap memerlukan material padat dengan ketebalan minimal 10 sampai 15 cm untuk efektif di frekuensi rendah. Busa piramid tidak termasuk kategori ini.

Apa perbedaan bass trap, panel absorpsi, dan diffuser di ruangan home theater?

Bass trap adalah panel berisi material padat tebal yang ditempatkan di sudut ruangan untuk menyerap energi frekuensi rendah. Panel absorpsi lebih tipis dan menangani frekuensi menengah sampai tinggi, biasanya dipasang di titik pantulan pertama di samping posisi duduk. Diffuser menyebarkan suara agar tidak ada pantulan langsung tanpa mengurangi energi total, cocok di dinding belakang ruangan yang cukup panjang.

Apakah kedap suara home theater perlu izin renovasi dari pengelola gedung atau kompleks perumahan?

Tergantung jenis properti dan lingkup pekerjaan. Pekerjaan yang mengubah struktur dinding, lantai, atau plafon umumnya memerlukan pemberitahuan atau persetujuan pengelola gedung, terutama di apartemen. Pekerjaan acoustic treatment yang bersifat surface-mounted tanpa mengubah struktur biasanya tidak memerlukan izin khusus. Konfirmasi ke pengelola sebelum pekerjaan dimulai adalah langkah yang disarankan.

Berapa lama pengerjaan akustik home theater ruangan kecil oleh kontraktor profesional?

Untuk ruangan di bawah 20 meter persegi dengan lingkup acoustic treatment tanpa perubahan struktur, pengerjaan bisa selesai dalam tiga sampai lima hari kerja setelah material tersedia. Jika pekerjaan mencakup isolasi dinding dan plafon dengan lapisan tambahan, durasi bisa dua sampai empat minggu tergantung kompleksitas konstruksi dan kondisi bangunan yang sudah ada. Survei awal diperlukan sebelum jadwal bisa ditetapkan.

Langkah Selanjutnya

Akustik home theater di ruangan kecil bukan proyek yang bisa dimulai dari membeli material lalu melihat hasilnya. Urutan yang benar dimulai dari pengukuran, diikuti perencanaan isolasi jika diperlukan, baru kemudian acoustic treatment. Melewati langkah ini hampir selalu berakhir dengan pekerjaan ulang yang lebih mahal dari biaya konsultasi awal.

Jika ruangan yang Anda rencanakan ternyata mendekati spesifikasi bioskop mini, baik dari segi dimensi maupun target kualitas suara, halaman pembuatan mini bioskop pribadi menjelaskan pendekatan yang berbeda dari home theater sederhana.

Untuk ruangan yang sudah ada dan ingin dievaluasi kondisi akustiknya, atau untuk proyek baru yang masih dalam tahap perencanaan, estimasi awal bisa dimulai tanpa komitmen biaya. Konsultasikan ruangan home theater Anda, gratis estimasi awal.

Rockwool vs Glasswool untuk Peredam Suara: Pilih yang Mana dan Kapan

Rockwool vs Glasswool untuk Peredam Suara: Pilih yang Mana dan Kapan

Dua pekerjaan berbeda yang sering dicampur aduk

Sebelum membahas Rockwool versus Glasswool, perlu diperjelas dulu dua pekerjaan akustik yang berbeda tapi sering dianggap sama.

Soundproofing adalah upaya menahan suara agar tidak melewati batas ruangan, dari dalam ke luar atau sebaliknya. Ini soal massa dinding, decoupling rangka, dan menutup seluruh jalur kebocoran. Acoustic treatment adalah upaya mengatur perilaku suara di dalam ruangan, mengurangi gema, mengontrol pantulan, dan memperpendek waktu dengung.

Rockwool dan Glasswool berkontribusi pada keduanya, tapi lewat mekanisme yang berbeda. Ketika dipasang sebagai pengisi rongga dinding, keduanya menambah transmission loss, yaitu seberapa banyak energi suara yang diserap sebelum menembus ke sisi lain dinding. Ketika dipasang sebagai panel absorber terbuka tanpa penutup keras, keduanya menyerap energi suara di dalam ruangan dan mengurangi waktu dengung.

Tanpa memahami konteks ini, pembeli bisa membeli material yang tepat tapi memasangnya di posisi yang salah, lalu bertanya-tanya kenapa hasilnya tidak sesuai ekspektasi. Pilihan antara Rockwool dan Glasswool tidak bisa dipisahkan dari pertanyaan: dipakai untuk apa, di konstruksi seperti apa, dan dengan target penurunan berapa desibel.


Apa itu Rockwool dan bagaimana cara kerjanya meredam suara?

Jawaban singkat: Rockwool terbuat dari serat batu vulkanik, densitasnya lebih tinggi (umumnya 40-80 kg per m3), dan lebih tahan api serta kelembaban. Glasswool terbuat dari serat kaca, lebih ringan dan lebih lentur, dengan densitas 16-48 kg per m3 untuk aplikasi akustik. Keduanya menyerap suara, tapi pilihan yang tepat bergantung pada konteks: jenis konstruksi dinding, frekuensi bising yang ingin diredam, dan kondisi ruangan. Tidak ada yang lebih baik secara absolut tanpa mengetahui detail proyeknya.

Rockwool dibuat dari batu basal atau terak vulkanik yang dilelehkan lalu dipintal menjadi serat mineral. Hasilnya adalah lembaran atau gulungan yang padat, kaku, dan tahan terhadap suhu tinggi.

Untuk aplikasi akustik, densitas yang umum dipakai berkisar antara 40 kg per m3 sampai 80 kg per m3. Semakin tinggi densitas, semakin rapat susunan seratnya, dan semakin besar hambatan yang diberikan terhadap gelombang suara, terutama di frekuensi menengah ke bawah. Ini yang membuat Rockwool densitas tinggi sering menjadi pilihan pertama di proyek yang menargetkan penurunan bising di bawah 500 Hz.

Dua properti non-akustik Rockwool yang relevan di lapangan adalah ketahanan api dan ketahanan kelembaban. Rockwool tidak mudah menyerap air, tidak mendukung pertumbuhan jamur, dan tidak terbakar dalam kondisi bangunan standar. Ini penting di gedung perkantoran dengan regulasi kebakaran ketat, atau di ruang mesin dan area yang terpapar kelembaban.

Kontraktor Studio mendistribusikan Rockwool sebagai salah satu material resmi. Informasi aplikasi dan spesifikasi teknis dari pabrikan juga tersedia di halaman aplikasi akustik Rockwool.


Apa itu Glasswool dan kapan ia lebih dipilih?

Glasswool dibuat dari serat kaca daur ulang yang dirajut menjadi lembaran fleksibel. Dibanding Rockwool, Glasswool lebih ringan dan lebih mudah dipotong mengikuti bentuk yang tidak beraturan.

Densitas Glasswool untuk aplikasi akustik umumnya berada di rentang 16 kg per m3 sampai 48 kg per m3. Pada ketebalan dan densitas yang sebanding, performa penyerapan Glasswool dan Rockwool tidak terpaut jauh di frekuensi menengah ke atas. Perbedaan mulai terlihat di frekuensi rendah, di mana Rockwool densitas tinggi biasanya unggul.

Karena bobotnya lebih ringan, Glasswool populer di plafon drop ceiling dan dinding partisi kantor. Pemasangnya bisa memotong dan memasukkan material ke dalam modul rangka plafon tanpa perlu khawatir rangka gantung kelebihan beban. Harganya pun biasanya lebih rendah per unit volume dibanding Rockwool densitas tinggi, sehingga menjadi pilihan ekonomis untuk proyek berskala luas.

Kelemahannya perlu dicatat: Glasswool lebih mudah menyerap kelembaban kalau tidak dilindungi lapisan foil atau vapor barrier yang memadai. Di area lembab atau ruang tanpa sirkulasi udara yang baik, kelembaban bisa menurunkan performa dan memperpendek umur material. Satu lagi, serat kaca yang lebih halus membuat penanganan selama instalasi perlu sarung tangan, kacamata, dan masker untuk menghindari iritasi kulit dan saluran pernapasan. Informasi teknis tambahan tersedia di halaman acoustic insulation Isover.


Perbandingan langsung: densitas, absorpsi, dan aplikasi

MaterialRentang DensitasKeunggulan AkustikKeunggulan Non-AkustikKelemahanAplikasi Tipikal
Rockwool40-80 kg/m3Transmission loss lebih baik di frekuensi menengah-rendah, performa konsisten di densitas tinggiTahan api, tahan kelembaban, lebih kaku dan mudah ditumpukLebih berat, harga per m3 lebih tinggi di densitas tinggiRongga dinding studio, ruang mesin, dinding partisi berperforma tinggi
Glasswool16-48 kg/m3Absorpsi baik di frekuensi menengah-tinggi, NRC kompetitif di ketebalan yang samaLebih ringan, lebih fleksibel, harga lebih terjangkau per m2Lebih rentan kelembaban tanpa foil, serat lebih halus (perlu APD saat instalasi)Plafon drop ceiling, dinding partisi kantor, panel absorber interior

Catatan penting soal NRC: Nilai NRC (Noise Reduction Coefficient) tidak hanya ditentukan oleh jenis material. Ketebalan panel, densitas, cara pemasangan (tempel rapat ke dinding atau diberi air gap), dan kondisi permukaan semuanya berpengaruh. Material yang sama bisa menghasilkan NRC yang berbeda tergantung instalasi.

Di proyek studio musik dan ruang recording, Rockwool 60 kg per m3 sering dipilih untuk pengisian rongga dinding ganda karena performa di frekuensi menengah-rendah lebih terukur. Di plafon kantor, Glasswool 24 kg per m3 sering lebih praktis karena bobotnya yang ringan dan kemudahan pemotongan di lapangan.


Mana yang lebih baik untuk studio musik dan ruang recording?

Untuk proyek studio musik, pertanyaan yang paling relevan adalah: material ini akan dipasang di mana dan untuk menangani frekuensi berapa?

Pada konstruksi dinding ganda (double wall), rongga udara antara kedua dinding diisi material absorber untuk mengurangi resonansi rongga dan meningkatkan transmission loss sistem. Di sinilah Rockwool 60 kg per m3 menunjukkan performa yang konsisten, terutama di rentang 125 Hz ke atas. Frekuensi di bawah itu, misalnya kick drum atau bass gitar, butuh massa dinding dan ketebalan total yang lebih besar, bukan sekadar pilihan material.

Glasswool bisa dipakai di posisi yang sama, tapi untuk hasil setara di frekuensi rendah, dibutuhkan densitas yang lebih tinggi atau ketebalan yang lebih besar. Ini bisa menggeser anggaran ke angka yang tidak jauh berbeda dari Rockwool.

Sebagai panel absorber terbuka untuk acoustic treatment di dalam ruangan, baik Rockwool maupun Glasswool bisa dipakai. Hasilnya lebih ditentukan oleh ketebalan panel daripada pilihan materialnya. Panel setebal 50 mm akan menangani frekuensi menengah, sementara panel 100 mm ke atas mulai berkontribusi di frekuensi yang lebih rendah.

Di ruang recording profesional, kombinasi keduanya sering dipakai: Rockwool di rongga dinding untuk isolasi, Glasswool di panel treatment untuk mengatur waktu dengung.


Mana yang lebih baik untuk kantor dan ruang rapat?

Aplikasi kantor biasanya menyangkut dua area: dinding partisi antar ruangan dan plafon drop ceiling untuk menyerap suara dari atas atau mengurangi reverb di dalam ruang.

Di kedua area tersebut, Glasswool 24-32 kg per m3 umumnya menjadi pilihan pertama. Alasannya praktis: bobot lebih ringan tidak membebani rangka gantung plafon, mudah dipotong sesuai modul standar, dan harganya lebih terjangkau per m2 untuk proyek yang mencakup ratusan meter persegi.

Rockwool masih dipilih kalau ada target STC tertentu yang harus dicapai, misalnya di ruang rapat kedap suara yang berdempetan dengan server room, ruang genset, atau area publik yang bising. Di kondisi ini, densitas dan massa tambahan dari Rockwool memberikan perbedaan yang terukur.

Situasi lain yang perlu dipertimbangkan: ketika renovasi dinding tidak memungkinkan karena keterbatasan izin, waktu, atau anggaran, booth akustik bisa menjadi alternatif langsung. Produk akustik siap pakai seperti meeting booth pod menawarkan privasi bicara tanpa menyentuh konstruksi dinding yang ada.


Kapan tidak ada material yang cukup: batasan kedua bahan ini

Jawaban singkat: Tidak ada material tunggal yang membuat ruangan kedap suara sendirian. Rockwool dan Glasswool berkontribusi pada penyerapan energi suara di dalam rongga dinding, tapi angka isolasi akhir ditentukan oleh sistem keseluruhan: massa dinding, decoupling rangka, ketebalan total, dan penanganan celah serta sambungan. Material yang salah ditempatkan di konstruksi yang benar masih bisa menghasilkan hasil yang baik, tapi material yang benar di konstruksi yang bocor akan tetap gagal.

Ini bagian yang penting untuk dipahami sebelum membeli material apa pun.

Rockwool dan Glasswool adalah komponen dari sistem konstruksi akustik, bukan solusi tunggal. Tanpa tiga elemen lain, angka isolasi tidak akan tercapai meski materialnya sudah tepat:

  • Massa dinding yang cukup: Hukum massa (mass law) menyatakan bahwa semakin berat dinding per meter persegi, semakin sulit suara menembusnya. Satu lapis gypsum board tipis tetap lemah meski rongganya diisi Rockwool penuh.
  • Decoupling rangka: Jika rangka dinding menempel langsung ke struktur bangunan tanpa pemisah elastis, getaran merambat lewat rangka dan melewati material pengisi sepenuhnya.
  • Penanganan flanking path: Suara menemukan jalur terkecil yang tersedia. Celah di sudut, sambungan dinding-plafon, lubang kabel, dan stop kontak yang tidak ditangani dengan benar bisa membatalkan kerja keras seluruh sistem dinding.

Inilah mengapa survei lapangan sebelum memilih material bukan langkah opsional. Kondisi bangunan yang ada, bising yang sudah masuk, dan target penurunan desibel yang realistis harus diketahui lebih dulu sebelum angka material ditulis di RAB.


Kesimpulan: cara memilih yang sesuai proyek Anda

Pilihan antara Rockwool dan Glasswool lebih mudah dibuat kalau empat pertanyaan ini sudah dijawab:

  1. Anggaran: Seberapa besar ruang untuk material per m2? Glasswool lebih ekonomis untuk proyek luas dengan target STC standar.
  2. Aplikasi ruang: Studio musik dan ruang recording biasanya butuh Rockwool 60 kg per m3 di rongga dinding. Plafon kantor biasanya cukup dengan Glasswool 24-32 kg per m3.
  3. Kondisi kelembaban: Area lembab atau tanpa ventilasi memadai lebih cocok dengan Rockwool yang lebih tahan terhadap kelembaban.
  4. Target penurunan desibel: Angka ini menentukan apakah satu lapisan cukup, atau perlu konstruksi dinding ganda dengan kombinasi kedua material.

Proyek nyata sering memakai keduanya di lapisan yang berbeda, bukan memilih satu untuk seluruh bangunan. Kontraktor Studio mendistribusikan Rockwool dan material akustik lain, termasuk Glasswool, K-Flex, Ecowool, dan aluminium foil, serta bisa merekomendasikan kombinasi yang tepat setelah survei lapangan dilakukan.

Untuk mendapatkan rekomendasi material yang sesuai spesifikasi proyek Anda, kunjungi halaman layanan peredam suara kami atau langsung konsultasikan kebutuhan Anda melalui formulir di bawah.

Konsultasikan kebutuhan material dan spesifikasi proyek Anda


FAQ: Rockwool, Glasswool, dan Material Peredam Suara

Apakah Rockwool lebih mahal dari Glasswool?

Secara umum, Rockwool dengan densitas tinggi (60-80 kg per m3) lebih mahal per meter kubik dibanding Glasswool dengan densitas setara. Tapi perbandingan harga yang adil harus memakai densitas yang sama karena Glasswool 16 kg per m3 dan Rockwool 60 kg per m3 tidak melakukan pekerjaan akustik yang sama. Harga akhir juga dipengaruhi oleh luas proyek dan volume pembelian. Kontraktor Studio mendistribusikan keduanya dan bisa memberikan penawaran material sesuai spesifikasi proyek.

Berapa ketebalan Rockwool atau Glasswool yang dibutuhkan untuk meredam suara?

Tidak ada angka tunggal yang berlaku untuk semua kasus. Sebagai panduan awal: ketebalan 50 mm dengan densitas 40-60 kg per m3 sudah berkontribusi pada pengisian rongga dinding standar. Untuk bass trap atau absorber panel yang menangani frekuensi rendah di bawah 250 Hz, ketebalan 100 mm ke atas memberikan hasil yang lebih terukur. Angka pasti ditentukan oleh frekuensi target, konstruksi dinding, dan hasil pengukuran di lapangan.

Apakah Rockwool aman untuk dipakai di dalam ruangan?

Rockwool yang sudah terpasang di dalam rongga dinding atau di balik lapisan panel tidak berbahaya karena seratnya tidak terekspos ke udara ruangan. Yang perlu diperhatikan adalah saat proses instalasi: serat mineral bisa mengiritasi kulit dan saluran pernapasan, sehingga pemasang wajib memakai sarung tangan, kacamata, dan masker. Setelah terpasang dan tertutup lapisan finishing, Rockwool tidak melepaskan partikel ke udara ruangan.

Bisakah Rockwool atau Glasswool dipakai untuk peredam suara di plafon?

Ya, keduanya umum dipakai di plafon drop ceiling untuk menyerap suara dari ruang atas atau mengurangi reverb di dalam ruangan. Glasswool sering lebih dipilih di aplikasi plafon karena bobotnya lebih ringan sehingga tidak membebani rangka gantung. Rockwool bisa dipakai tapi perlu memastikan kapasitas rangka plafon mencukupi beban tambahan. Pemasangan di atas panel plafon dan di dalam rongga adalah dua posisi yang memberikan efek berbeda.

Apakah Rockwool atau Glasswool cukup tanpa material lain?

Tidak. Keduanya adalah komponen dari sistem konstruksi akustik, bukan solusi tunggal. Untuk soundproofing yang terukur, Rockwool atau Glasswool perlu dikombinasikan dengan massa dinding yang cukup (gypsum board berlapis atau beton), decoupling rangka dari struktur utama, dan penutupan celah di sambungan, sudut, dan penetrasi kabel. Memasang material tanpa memperhatikan sistem keseluruhan akan menghasilkan angka isolasi yang jauh di bawah ekspektasi.

Mana yang lebih cocok untuk peredam suara di rumah: Rockwool atau Glasswool?

Untuk proyek residensial seperti studio rumahan atau ruang home theater, Rockwool 60 kg per m3 sering dipilih karena performa di frekuensi menengah lebih konsisten dan tahan kelembaban lebih baik. Glasswool bisa menjadi alternatif yang lebih ekonomis di partisi interior tanpa paparan kelembaban. Pilihan akhir tetap bergantung pada konstruksi dinding yang ada, anggaran, dan target penurunan desibel yang realistis untuk ruangan tersebut.